
Skeletal Muscle Fibre: Difference between revisions
(Created page with "This schematic model was developed to help third year medical students understand the relationships between the parts of the peritoneum of the female pelvis. The model shows organs, ligaments and peritoneum within the lesser or true pelvis i.e. only from the pelvic inlet down. Click to enlarge images: <gallery mode= "nolines" widths=650px heights=500px> FemPeritoneum_Complete1.jpg| </gallery> <gallery mode="nolines" widths=300px heights=250px> FemPeritoneum_Complete2.j...") |
No edit summary |
||
| Line 1: | Line 1: | ||
<gallery mode= "nolines" widths=650px heights=500px> | <gallery mode= "nolines" widths=650px heights=500px> | ||
TanyaHero.JPG| | |||
</gallery> | </gallery> | ||
<gallery mode="nolines" widths= | This schematic model was developed to help first year health science students understand the relationships between sarcomeres, myofibrils, sarcolemma, T-tubules, and sarcoplasmic reticulum, as well as muscle cell nuclei and the collagen which makes up tendon. The students realise that the structure of a skeletal muscle fibre is simpler than they imagine from looking at textbooks and easier to remember. | ||
= Production Information = | |||
The model is based around 56 standard 330ml beverage cans. Quite a lot of muscle power used to empty all of them! | |||
<gallery mode= "nolines" widths=650px heights=500px> | |||
CansInARow.jpeg| | |||
</gallery> | </gallery> | ||
Most of the cans were wired together into rows of eight, using galvanised 14-gauge wire (e.g., a 20-meter roll), and custom-made washers cut from 0.5mm thick aluminium sheeting (e.g., a piece 300mm x 900mm). The last set of eight cans was divided into a single can and a set of three and a set of four. The sets of three and four were wired together in the same way as the others. | |||
Tools useful for the above steps include tin snips, drill, cutting pliers, miscellaneous other pliers for twisting a knot in the ends of the wire, pen, a point punch, and hammer. | |||
Once wired up, all the cans were spray painted a solid (e.g., pink) colour. This required quite a lot of specialised paint (metal primer and topcoat) and may be optional depending on how opaque the lace fabric used for sarcoplasmic reticulum is. | |||
The single can was also wrapped with paper printed with the following image of actin and myosin filaments. Printing size was adjusted to suit the length of the can. | |||
<gallery mode="nolines" widths= | Click to enlarge image: | ||
<gallery mode="nolines" widths=300px heights=300px> | |||
ActinMyosinWrap.jpg | |||
</gallery> | </gallery> | ||
''' | == Fabric parts of the model == | ||
'''Materials required:''' | |||
* Calico fabric, 150cm wide x 1 meter | |||
* Black lace fabric x 2 meters | |||
* White poplin, 112cm wide x 1 meter | |||
* Purple fabric, 0.3 meter | |||
* Invisible zip, black, 30cm long | |||
* Large plastic zip, cream colour, 90cm long | |||
* Wadding | |||
''' | '''The pattern pieces''' (background grid is 100mm x 100mm): | ||
Click to enlarge images | Click to enlarge images: | ||
<gallery mode="nolines" widths=200px heights=200px> | <gallery mode="nolines" widths=200px heights=200px> | ||
PatternSarcolemmaT-tubules.JPG|Calico for Sarcolemma, T-tubules | |||
PatternSarcoplasmicReticulum.JPG|Black lace for Sarcoplasmic reticulum | |||
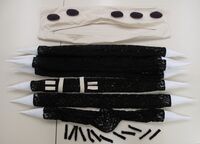
PatternNucleiTendon.JPG|Purple fabric for nuclei and white fabric for collagen of tendons | |||
</gallery> | </gallery> | ||
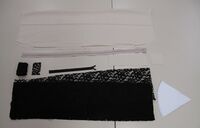
'''Some steps in the production process:''' | |||
Click to enlarge images | Click to enlarge images: | ||
<gallery mode="nolines" widths=200px heights=200px> | <gallery mode="nolines" widths=200px heights=200px> | ||
FabricCutOut.jpeg|1. Fabric pieces cut out. | |||
NucleiMade.jpeg|2. Nuclei cut, sewn, and stuffed with wadding. | |||
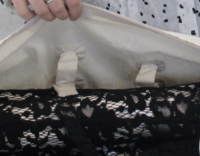
PartiallySewnUp.jpeg|3. Main part of calico sewn up, with zip inserted. Nuclei hand-sewn on in random places. <br> | |||
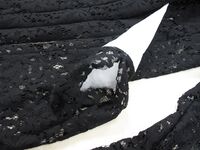
4. Tendon pieces sewn to lace and the seven lace tubes formed. Each has an opening near one end, with one tube having an invisible zip placed in the opening (roughly where the single can will go). | |||
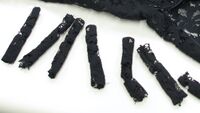
TendonStuffing.jpeg|5. Wadding stuffed into the tendon pieces. <br> | |||
6. Cans inserted into tubes, which are then hand-sewn closed. The short lengths and single can go into the tube with the invisible zip. | |||
T-TubulesSewing1.jpeg|7. T-tubule parts sewn up from calico: two rings and four short tubes. | |||
T-TubulesSewing2.png|8. Form four reinforced holes in the outer sarcolemma at the level of the ends of a can, slip the two rings over a myofibril and hand-sew the T-tubule elements together. | |||
SarcolemmaTubes.jpeg|9. Small sarcolemma tubes sewn up from lace and hand-sewn randomly between the larger lace elements. | |||
</gallery> | </gallery> | ||
'''Creators:''' Dr | '''Creators:''' Dr Tanya Cully (initial idea, can painting and academic support) from [https://www.otago.ac.nz/physiology Department of Physiology, University of Otago], Fieke Neuman (patterns, wiring up cans and sewing) from [https://www.otago.ac.nz/anatomy Department of Anatomy, University of Otago]. | ||
'''Keywords:''' Teaching, | '''Keywords:''' Teaching, Physiology, Medicine, Muscle, Science, Biology | ||
Revision as of 00:53, 10 November 2023

This schematic model was developed to help first year health science students understand the relationships between sarcomeres, myofibrils, sarcolemma, T-tubules, and sarcoplasmic reticulum, as well as muscle cell nuclei and the collagen which makes up tendon. The students realise that the structure of a skeletal muscle fibre is simpler than they imagine from looking at textbooks and easier to remember.
Production Information
The model is based around 56 standard 330ml beverage cans. Quite a lot of muscle power used to empty all of them!

Most of the cans were wired together into rows of eight, using galvanised 14-gauge wire (e.g., a 20-meter roll), and custom-made washers cut from 0.5mm thick aluminium sheeting (e.g., a piece 300mm x 900mm). The last set of eight cans was divided into a single can and a set of three and a set of four. The sets of three and four were wired together in the same way as the others. Tools useful for the above steps include tin snips, drill, cutting pliers, miscellaneous other pliers for twisting a knot in the ends of the wire, pen, a point punch, and hammer. Once wired up, all the cans were spray painted a solid (e.g., pink) colour. This required quite a lot of specialised paint (metal primer and topcoat) and may be optional depending on how opaque the lace fabric used for sarcoplasmic reticulum is. The single can was also wrapped with paper printed with the following image of actin and myosin filaments. Printing size was adjusted to suit the length of the can.
Click to enlarge image:

Fabric parts of the model
Materials required:
- Calico fabric, 150cm wide x 1 meter
- Black lace fabric x 2 meters
- White poplin, 112cm wide x 1 meter
- Purple fabric, 0.3 meter
- Invisible zip, black, 30cm long
- Large plastic zip, cream colour, 90cm long
- Wadding
The pattern pieces (background grid is 100mm x 100mm):
Click to enlarge images:
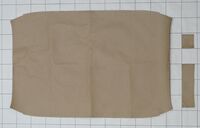
Calico for Sarcolemma, T-tubules
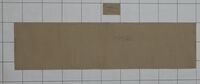
Black lace for Sarcoplasmic reticulum
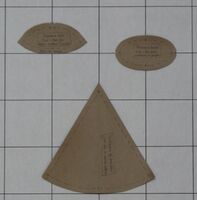
Purple fabric for nuclei and white fabric for collagen of tendons


Some steps in the production process:
Click to enlarge images:
1. Fabric pieces cut out.
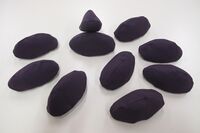
2. Nuclei cut, sewn, and stuffed with wadding.
3. Main part of calico sewn up, with zip inserted. Nuclei hand-sewn on in random places.
- 4. Tendon pieces sewn to lace and the seven lace tubes formed. Each has an opening near one end, with one tube having an invisible zip placed in the opening (roughly where the single can will go).
5. Wadding stuffed into the tendon pieces.
- 6. Cans inserted into tubes, which are then hand-sewn closed. The short lengths and single can go into the tube with the invisible zip.
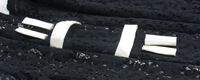
7. T-tubule parts sewn up from calico: two rings and four short tubes.
8. Form four reinforced holes in the outer sarcolemma at the level of the ends of a can, slip the two rings over a myofibril and hand-sew the T-tubule elements together.
9. Small sarcolemma tubes sewn up from lace and hand-sewn randomly between the larger lace elements.


Creators: Dr Tanya Cully (initial idea, can painting and academic support) from Department of Physiology, University of Otago, Fieke Neuman (patterns, wiring up cans and sewing) from Department of Anatomy, University of Otago.
Keywords: Teaching, Physiology, Medicine, Muscle, Science, Biology
![]()
This work is licensed under a Creative Commons Attribution-NonCommercial-ShareAlike 4.0 International License