How to Wrap a Uterus: Difference between revisions
(Created page with "A performance piece which makes the location of the ovaries in relation to the uterus, bladder and rectum hard to forget. Designed for audience participation in a large lectur...") |
No edit summary |
||
| Line 16: | Line 16: | ||
Ovaries01.jpg| | Ovaries01.jpg| | ||
</gallery> | </gallery> | ||
* Aluminium strip, approx. 1.5m of 25mm x 2.5mm | |||
* Duct tape, grey | |||
* Velcro, sew in variety, approx. 2.5m each of hook and loop | |||
* Polystyrene balls (approx. 125mm diameter), x4 | |||
* Hot glue | |||
* Paper and PVA glue for Papier-mâché | |||
* Acrylic paints | |||
* Spray on sealant | |||
* Padded bags with drawstring | |||
* Brushed cotton or Polar fleece fabric in suitable colours for sweatshirts | |||
* Felt fabric, white for embroidery | |||
* Glass organza (polyester) fabric for peritoneum, approx. 5m of 140cm wide fabric | |||
* Bias binding, approx. 10m | |||
2. Method: Strap-on Ovaries | 2. Method: Strap-on Ovaries | ||
| Line 33: | Line 34: | ||
Ovaries02.jpg| | Ovaries02.jpg| | ||
</gallery> | </gallery> | ||
* Bend aluminium to fit the chest of an average person. Leave a bit of spring so that it will grip, in part, without the duct tape straps. Cut away excess with hacksaw if needed to make the ends even. | |||
<gallery mode="nolines" widths=200px heights=200px> | <gallery mode="nolines" widths=200px heights=200px> | ||
Ovaries03.jpg| | Ovaries03.jpg| | ||
</gallery> | </gallery> | ||
* Make straps out of a few layers of duct tape. We found that a couple more straps were needed than shown, to go over the shoulders. Velcro was sewn onto the straps. | |||
* Cut each of the polystyrene balls with a saw about 5/8ths across the diameter. Discard the smaller pieces and hot glue pairs of the larger pieces together to make two ovoids. Using a hacksaw or similar, make a cut into the end of these to accommodate the ends of the aluminium strip. Secure with hot glue. | |||
<gallery mode="nolines" widths=200px heights=200px> | <gallery mode="nolines" widths=200px heights=200px> | ||
Ovaries04.jpg| | Ovaries04.jpg| | ||
</gallery> | </gallery> | ||
* Papier-mâché over the polystyrene, building up the lumpy shapes of multiple follicles. Finish with finer textured paper. | |||
<gallery mode="nolines" widths=200px heights=200px> | <gallery mode="nolines" widths=200px heights=200px> | ||
Ovaries05.jpg| | Ovaries05.jpg| | ||
</gallery> | </gallery> | ||
* When completely dry, decorate with acrylic paints and seal the completed ovaries with a spray art-sealant. | |||
<gallery mode="nolines" widths=200px heights=200px> | <gallery mode="nolines" widths=200px heights=200px> | ||
Ovaries06.jpg| | Ovaries06.jpg| | ||
</gallery> | </gallery> | ||
* Some padded bags will protect the ovaries from accidental knocks. | |||
3. Method - Sweatshirts | 3. Method - Sweatshirts | ||
* Make up the sweatshirts, using a pattern large enough to suit most people. | |||
<gallery mode="nolines" widths=200px heights=200px> | <gallery mode="nolines" widths=200px heights=200px> | ||
Ovaries07.jpg| | Ovaries07.jpg| | ||
</gallery> | </gallery> | ||
* Create two plackets in the back of the uterus sweatshirt to accommodate the ovarian ligaments. Sew in some Velcro tabs. | |||
<gallery mode="nolines" widths=200px heights=200px> | <gallery mode="nolines" widths=200px heights=200px> | ||
Ovaries08.jpg| | Ovaries08.jpg| | ||
</gallery> | </gallery> | ||
* Trace a design for the embroidery onto white felt. Pin in place on the sweatshirt and embroider with black stitching. Trim away the felt from around the stitching. | |||
4. Method - Peritoneum | 4. Method - Peritoneum | ||
| Line 68: | Line 69: | ||
Ovaries10.jpg| | Ovaries10.jpg| | ||
</gallery> | </gallery> | ||
* Sew the two layers together just under the arm of the wearer. Optional: the wrist opening can be finished with a cuff of e.g. white cotton lycra. | |||
<gallery mode="nolines" widths=200px heights=200px> | <gallery mode="nolines" widths=200px heights=200px> | ||
Ovaries11.jpg| | Ovaries11.jpg| | ||
Ovaries12.jpg| | Ovaries12.jpg| | ||
</gallery> | </gallery> | ||
* On one layer only of the organza (the posterior layer) sew strips of Velcro to create the Mesovarium. | |||
* On both layers sew down smaller pieces of Velcro, which join to form the Mesometrium. | |||
* The remaining free ends of the organza can be finished by roll-hemming (anterior and posterior edges) or with bias binding (lateral edges). These parts of the model illustrate the layers of the peritoneum that cover the bladder (anterior layer) and rectum (posterior layer) | |||
'''Creators:''' Dr Brad Hurren (initial idea and academic support, painting), Fieke Neuman (sculpting, patterns and sewing). All from [http://www.otago.ac.nz/anatomy Department of Anatomy], [http://www.otago.ac.nz University of Otago] | '''Creators:''' Dr Brad Hurren (initial idea and academic support, painting), Fieke Neuman (sculpting, patterns and sewing). All from [http://www.otago.ac.nz/anatomy Department of Anatomy], [http://www.otago.ac.nz University of Otago] | ||
Revision as of 03:08, 30 October 2017
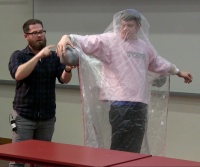
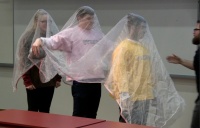
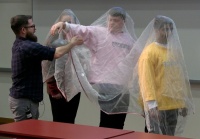
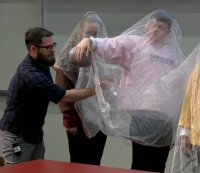
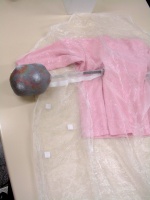
A performance piece which makes the location of the ovaries in relation to the uterus, bladder and rectum hard to forget. Designed for audience participation in a large lecture theatre situation the completed assemblage makes the peritoneal folds that wrap the organs in this part of the pelvis easy to understand.
Movie of HUBS192 demonstration
Click to enlarge images of Dr Hurren and first year health science students using the assemblage:
Production Information
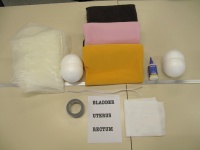
1. Materials
- Aluminium strip, approx. 1.5m of 25mm x 2.5mm
- Duct tape, grey
- Velcro, sew in variety, approx. 2.5m each of hook and loop
- Polystyrene balls (approx. 125mm diameter), x4
- Hot glue
- Paper and PVA glue for Papier-mâché
- Acrylic paints
- Spray on sealant
- Padded bags with drawstring
- Brushed cotton or Polar fleece fabric in suitable colours for sweatshirts
- Felt fabric, white for embroidery
- Glass organza (polyester) fabric for peritoneum, approx. 5m of 140cm wide fabric
- Bias binding, approx. 10m
2. Method: Strap-on Ovaries
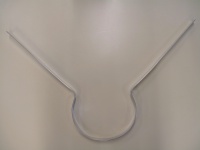
- Bend aluminium to fit the chest of an average person. Leave a bit of spring so that it will grip, in part, without the duct tape straps. Cut away excess with hacksaw if needed to make the ends even.
- Make straps out of a few layers of duct tape. We found that a couple more straps were needed than shown, to go over the shoulders. Velcro was sewn onto the straps.
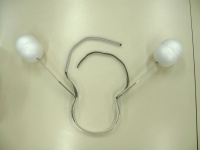
- Cut each of the polystyrene balls with a saw about 5/8ths across the diameter. Discard the smaller pieces and hot glue pairs of the larger pieces together to make two ovoids. Using a hacksaw or similar, make a cut into the end of these to accommodate the ends of the aluminium strip. Secure with hot glue.
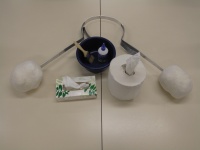
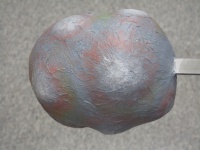
- Papier-mâché over the polystyrene, building up the lumpy shapes of multiple follicles. Finish with finer textured paper.
- When completely dry, decorate with acrylic paints and seal the completed ovaries with a spray art-sealant.
- Some padded bags will protect the ovaries from accidental knocks.
3. Method - Sweatshirts
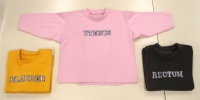
- Make up the sweatshirts, using a pattern large enough to suit most people.
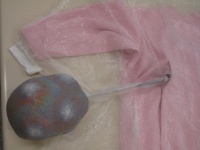
- Create two plackets in the back of the uterus sweatshirt to accommodate the ovarian ligaments. Sew in some Velcro tabs.
- Trace a design for the embroidery onto white felt. Pin in place on the sweatshirt and embroider with black stitching. Trim away the felt from around the stitching.
4. Method - Peritoneum
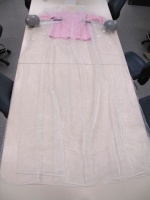
- Sew the two layers together just under the arm of the wearer. Optional: the wrist opening can be finished with a cuff of e.g. white cotton lycra.
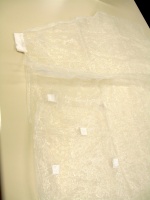
- On one layer only of the organza (the posterior layer) sew strips of Velcro to create the Mesovarium.
- On both layers sew down smaller pieces of Velcro, which join to form the Mesometrium.
- The remaining free ends of the organza can be finished by roll-hemming (anterior and posterior edges) or with bias binding (lateral edges). These parts of the model illustrate the layers of the peritoneum that cover the bladder (anterior layer) and rectum (posterior layer)
Creators: Dr Brad Hurren (initial idea and academic support, painting), Fieke Neuman (sculpting, patterns and sewing). All from Department of Anatomy, University of Otago
Keywords: Teaching, Anatomy, Uterus, Ovary, Pelvis, Science, Biology
This work is licensed under a Creative Commons Attribution-NonCommercial-ShareAlike 4.0 International License

