Apical Constriction: Difference between revisions
No edit summary |
mNo edit summary |
||
| Line 10: | Line 10: | ||
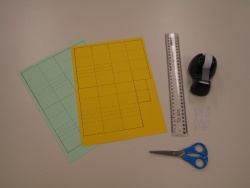
1. Print the attached pdf onto heavy paper / light cardboard and gather some other gear: scissors, tape, a ruler and some paper clips. | 1. Print the attached pdf onto heavy paper / light cardboard and gather some other gear: scissors, tape, a ruler and some paper clips. | ||
[https://anatomy-teaching-models.wiki.otago.ac.nz/images/ | [https://anatomy-teaching-models.wiki.otago.ac.nz/images/a/a5/ApicalContrictionPrintOut.pdf] | ||
<gallery mode="nolines" widths=250px heights=200px> | <gallery mode="nolines" widths=250px heights=200px> | ||
ApicalConstriction01.jpg| | ApicalConstriction01.jpg| | ||
Revision as of 03:21, 26 July 2017
Apical Constriction
During embryonic development flat sheets of epithelial cells bend or hinge at specific places at specific times to create important structures like the neural groove and neural folds. Have you ever wondered how a flat sheet of cells does this bending? If you think about it, the box-like cells that make up the flat sheet of an epithelium wouldn’t naturally bend. However, if the surface area of one side of a box became smaller, that box would then become wedge-shaped and a bend would be created in the sheet it is part of. In life this apical constriction is created by a number of different processes, including localized contraction of actinomyosin complexes in the apical border of the cells. You can get a hands-on feel for how this works by joining up a series of boxes and then constricting the apical borders of some of them.
- ApicalConstriction09.jpg
Instructions
Click to enlarge any of the following images:
1. Print the attached pdf onto heavy paper / light cardboard and gather some other gear: scissors, tape, a ruler and some paper clips. [1]
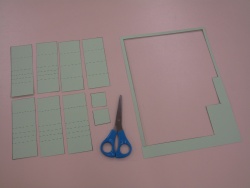
2. Cut along all the solid lines.
3. Use a ruler to fold along the dotted lines. Each of the 7 larger pieces will become a cell.
- ApicalConstriction03.jpg
4. Fold the sides of the cells flat and join with tape.
- ApicalConstriction04.jpg
5. Shape the cells back into a box shape. Two of the cells will have four flat faces while the other five will have a couple of extra folds on one face. These extra folds can be flattened out for now.
- ApicalConstriction05.jpg
6. Join the cells side to side with tape. The two square cells should be at the ends and the remaining cells lined up between them with the extra folds all along the same side.
- ApicalConstriction06.jpg
7. Tape the two remaining squares of paper to the end cells so they keep their square profile.
- ApicalConstriction07.jpg
8. The completed flat row of cuboidal cells.
- ApicalConstriction08.jpg
9. Now constrict the apical portions of the five middle cells to see how the curve is created. Hold in place with paper clips.
- ApicalConstriction09.jpg
Creators: Fieke Neuman and Dr Christine Jasoni. Both from Department of Anatomy, University of Otago
Keywords: Teaching, Anatomy, Development, Science, Biology
This work is licensed under a Creative Commons Attribution-NonCommercial-ShareAlike 4.0 International License


