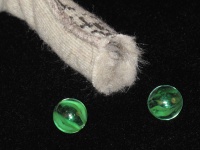
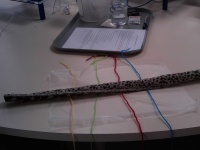
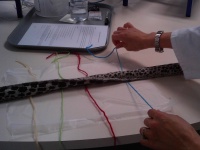
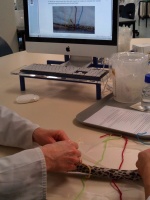
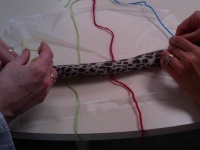
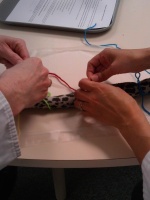
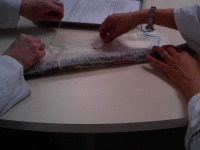
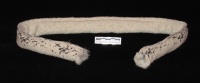
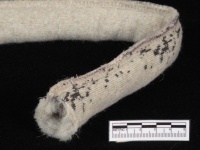
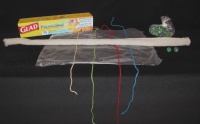
Artery vs Vein

From Anatomy Teaching Models

A pair of models to demonstrate the similarities and differences between a medium-sized vein and a muscular artery. When dropped, the artery will remain an open tube while the vein will collapse.

Fabric colouring for this model was chosen to match a first year health science textbook: Visual anatomy & physiology : global edition, Frederic Martini; William C. Ober; Judi Lindsley Nath; Edwin F. Bartholomew; Kevin Petti.

Click to enlarge images of first year health science students using the models in a laboratory class.


Production Information

Click on any image to enlarge.

Fabrics & thread

  • Collagen - Cream furnishing fabric (no stretch, woven look)
  • Muscle - Red polar fleece
  • Elastin - Black lycra
  • Endothelium - Purple textured lycra
  • matching threads for each of the fabrics
  • clear nylon thread


Patterns

  • Tunica Externa (Adventitia) - 250mm circumference, 180mm length
  • Tunica Media - 237mm circumference, 215mm length
  • Tunica Intima - 225mm circumference, 250mm length
  • Bicuspid valve - 72mm open end, 78mm at widest, 72mm long

In the following image the background grid is 100mm by 100mm.


Artery model

  • Tunica Intima - 1 layer Endothelium, 1 layer Collagen, 2 layers Elastin
  • Tunica Media - 5 layers Muscle
  • Tunica Externa (Adventitia) - 1 layer Collagen


Vein model

  • Tunica Intima - 1 layer Endothelium (with 2 valves), 1 layer Collagen
  • Tunica Media - 1 layer Muscle
  • Tunica Externa (Adventitia) - 2 layers Collagen


Prepare each layer

  1. Overlock all the edges of the woven fabrics that would otherwise fray.
  2. Create valves in the vein Intima by stitching the valve pieces down between marks using a multi-step stretch stitch.
  3. Sew all of the parts of a layer together with wide zig-zag around three edges. On the fourth edge tack the layers together with three patches of multi-step stretch stitch so that the individual layers can be inspected. For the neatest result match the bobbin and top thread colours to the fabric colours being sewn on either side.
  4. Sew each layer into a partial tube by folding the piece in half lengthwise and zig-zagging about 70mm together. A butt seam can be achieved by letting half of the stich lap over the edge.


Joining the layers

  1. Insert the layers into each other with the tube ends together.
  2. Handsew through all layers at the tube end with nylon thread. Work about 15mm in from the end so the layers can be viewed more easily. The intima of the artery will naturally ripple as it is sewn in.


Creators: Dr Rebecca Bird (initial idea and academic support), Fieke Neuman (patterns and sewing). All from Department of Anatomy. Associate Professor Greg Jones (academic support) from Dunedin School of Medicine, University of Otago.

Keywords: Teaching, Anatomy, Science, Biology, Blood vessels


CC.png

This work is licensed under a Creative Commons Attribution-NonCommercial-ShareAlike 4.0 International License